
Klustron与Oracle进行性能对比测试/
Klustron与Oracle进行性能对比测试/
** 概述 **
通过使用业界流行的TPCC性能测试工具(BenchmarkSQL),针对Klustron和Oracle分别进行测试,获得性能对比结论。
测试环境一: (Oracle 19c)
Oracle版本:19.14.0.0.0
部署模式:单实例
重点参数:SGA:32G , PGA_TARGET: 12G,未开启归档
运行环境: CentOS 8.5 Linux 64位,CPU:AMD Ryzen 9 7950X 16-Core Processor, MEM: 128G, 存储:M.2 NVME SSD PCIE 4 固态 2T
IP: 192.168.0.20
测试环境二 : (Klustron)
| 节点类型 | IP | 端口 |
|---|---|---|
| 计算节点 | 192.168.0.20 | 47001 |
| Shard1主节点 | 192.168.0.21 | 57003 |
| Shard2主节点 | 192.168.0.22 | 57005 |
| XPanel | 192.168.0.20 | 40580 |
Klustron 版本: Klustron-1.2.1
部署模式:与Oracle类似,没有带备机,两个storage shard,一个计算节点。
运行环境:CentOS 8.5 Linux 64位,CPU:AMD Ryzen 9 7950X 16-Core Processor, MEM: 128G, 存储:M.2 NVME SSD PCIE 4 固态 2T
测试环境三:( BenchmarkSQL )
BenchmarkSQL: v5.0
部署模式:单节点
重点参数:
warehouses=50
	terminals=10
	runMins=1
	newOrderWeight=45
	paymentWeight=43
	orderStatusWeight=4
	deliveryWeight=4
	stockLevelWeight=4
运行环境:CentOS 8.5 Linux 64位,CPU:AMD Ryzen 9 7950X 16-Core Processor, MEM: 128G, 存储:M.2 NVME SSD PCIE 4 固态 2T
IP: 192.168.0.19
备注:BenchmarkSQL所在的Linux 环境,需要安装好R,否则,测试结果报告中将不会显示图片分析结果
01 Oracle 性能测试
1.1. 测试准备
1.1.1. 对Oracle所运行的机器进行资源监控配置
在BenchmarkSQL配置文件(props.ora)中设置资源监控,搜集压测中的CPU,存储IO,网络IO相关的负载参数, 关键参数:
osCollectorSSHAddr=oracle@192.168.0.20 #需要配置免密访问
osCollectorDevices=net_enp4s0 blk_nvme1n1 #需要依目标机的网卡接口名及存储设备名调整名称。
1.1.2. 测试数据生成
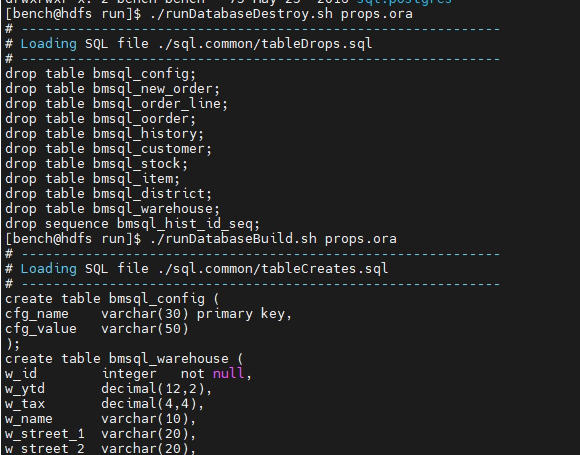
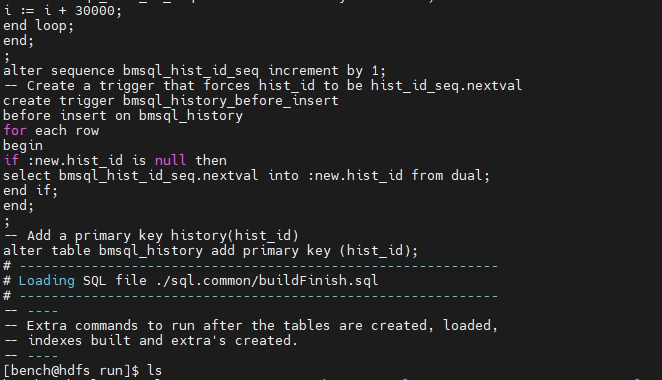
运行runDatabaseBuild.sh props.ora 生成测试数据,输出类似如下的信息
1.1.3. 对测试数据进行统计分析
在Oracle所在的服务器,以sysdba用户连接到数据库,执行统计信息收集:
SQL> conn / as sysdba
Connected.
SQL> exec dbms_stats.gather_schema_stats('BENCH');   #测试数据用户BENCH
PL/SQL procedure successfully completed.
1.2. 进行测试
执行 runBenchMark.sh props.ora, 将有类似如下信息输出:
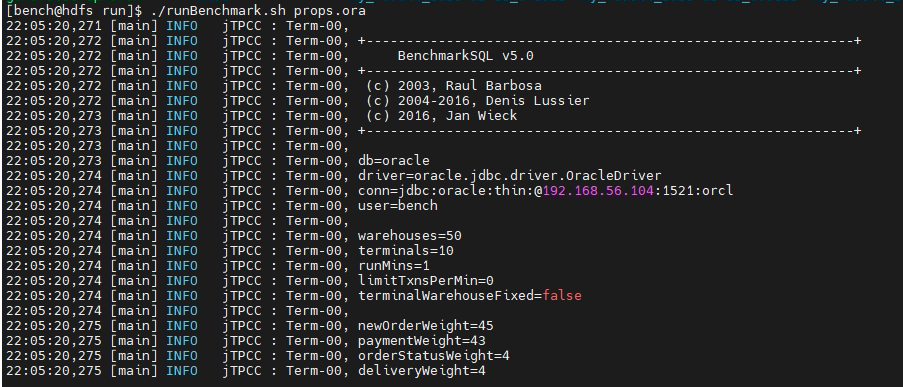
压测完成后,在当前目录会生成类似:my_result_2023-04-15_222553 的目录。
1.3. 测试报告生成及结果阅读
执行generateReport.sh < my_result目录>将生成html分析报告,以当前配置的压测用例(warehouses=50,terminals=20,runMins=1**)**在报告文件中获得的关键输出信息如下:
| Transaction Type | Latency | Count | Percent | Rollback | Errors | Skipped Deliveries | |
|---|---|---|---|---|---|---|---|
| 90th % | Maximum | ||||||
| NEW_ORDER | 0.005s | 8.794s | 79230 | 44.886% | 0.963% | 0 | N/A |
| PAYMENT | 0.003s | 8.792s | 76026 | 43.071% | N/A | 0 | N/A |
| ORDER_STATUS | 0.001s | 8.788s | 7083 | 4.013% | N/A | 0 | N/A |
| STOCK_LEVEL | 0.001s | 0.016s | 7025 | 3.980% | N/A | 0 | N/A |
| DELIVERY | 0.000s | 0.001s | 7148 | 4.050% | N/A | 0 | N/A |
| DELIVERY_BG | 0.008s | 8.801s | 7148 | N/A | N/A | 0 | 0 |
Overall tpmC: 79230.00
Overall tpmTotal: 176512.00
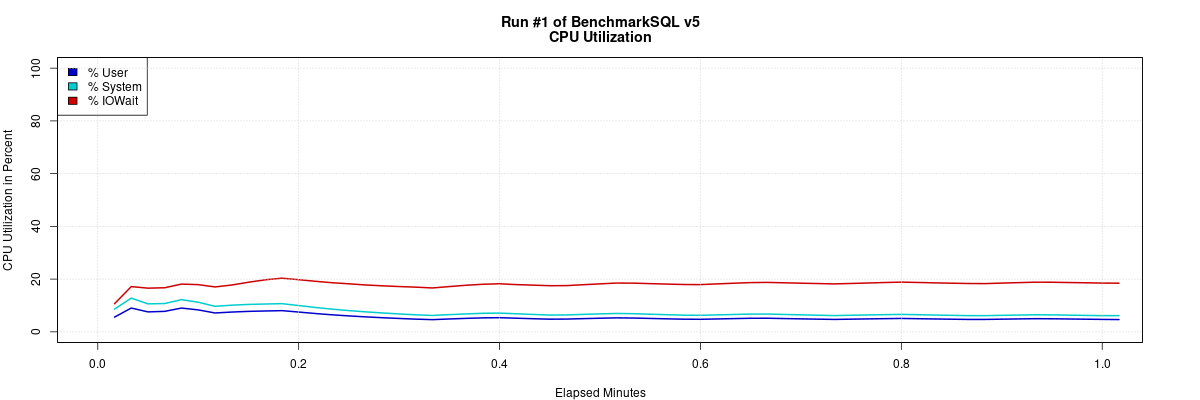
Oracle所在机器的负载监测情况如下:
1.4. 对压测设定不同的并发数:20,50,100,200获得如下的统计结果
| 并发用户数 | tpmC | tpmTotal | 备注 |
|---|---|---|---|
| 20 | 78995.64 | 175990.89 | |
| 50 | 84918.44 | 188703.54 | |
| 100 | 97179.37 | 215940.76 | |
| 200 | 96457.92 | 214142.63 |
500warehouses
| 并发用户数 | tpmC | tpmTotal | 备注 |
|---|---|---|---|
| 50 | 136071.81 | 302484.41 | |
| 100 | 149889.71 | 332070.93 | |
| 200 | 98523.34 | 218430.36 | |
| 400 | 62831.25 | 139880.84 | |
| 600 | 87321.82 | 194175.92 | |
| 800 | 76169.41 | 169711.68 |
02 Klustron性能测试
2.1. 测试准备
2.1.1. 安装Klustron
<略>
附用于测试创建的集群参数设定

2.1.2. 修改计算节点及存储节点的参数
计算节点(Klustron-server)重点参数:
shared_buffers = 34359738368   (%25 RAM)
statement_timeout=6000000
mysql_read_timeout=1200
mysql_write_timeout=1200
lock_timeout=1200000
log_min_duration_statement=1200000
effective_cache_size = 68719476736   (%50 RAM)
work_mem  = 8MB
wal_buffers = ‘64MB’
autovacuum=false
psql -h 192.168.0.20 -p 47001 -U abc postgres
alter system set shared_buffers='32GB';
alter system set statement_timeout=6000000;
alter system set mysql_read_timeout=1200;
alter system set mysql_write_timeout=1200;
alter system set lock_timeout=1200000;
alter system set log_min_duration_statement=1200000;
alter system set effective_cache_size = '64GB';
alter system set work_mem  = '8MB';
alter system set wal_buffers='64MB';
alter system set autovacuum=false;

alter system set log_min_messages='DEBUG1' ;  #需要debug sql时开启
alter system set enable_sql_log=on;  #需要debug sql 时开启


pg_ctl restart -D /nvme2/kunlun/server_datadir/47001
存储节点(Klustron-storage)重点参数:
innodb_buffer_pool_size=32*1024*1024*1024
lock_wait_timeout=1200
innodb_lock_wait_timeout=1200
fullsync_timeout=1200000
enable_fullsync=false
innodb_flush_log_at_trx_commit=2
sync_binlog=0
max_binlog_size=1*1024*1024*1024
mysql -h 192.168.0.21 -P 57003 -upgx -ppgx_pwd
mysql -h 192.168.0.22 -P 57005 -upgx -ppgx_pwd
set global innodb_buffer_pool_size=32*1024*1024*1024;
set global lock_wait_timeout=1200;
set global innodb_lock_wait_timeout=1200;
set global fullsync_timeout=1200000;
set global enable_fullsync=false;
set global innodb_flush_log_at_trx_commit=2;
set global sync_binlog=0;
set global max_binlog_size=1*1024*1024*1024;

set global enable_fullsync=off;  #由于没带备机,所以所有shard主节点关闭全同步
set enable_fullsync=off;    #由于没带备机, 所以所有shard主节点关闭全同步

set global general_log=on ;   #需要debug SQL时打开


pg_ctl restart -D /nvme2/kunlun/server_datadir/47001
存储节点(Klustron-storage)重点参数:
innodb_buffer_pool_size=32*1024*1024*1024
lock_wait_timeout=1200
innodb_lock_wait_timeout=1200
fullsync_timeout=1200000
enable_fullsync=false
innodb_flush_log_at_trx_commit=2
sync_binlog=0 # 磁盘带宽有限,关闭binlog
max_binlog_size=1*1024*1024*1024
mysql -h 192.168.0.21 -P 57003 -upgx -ppgx_pwd
mysql -h 192.168.0.22 -P 57005 -upgx -ppgx_pwd
set global innodb_buffer_pool_size=32*1024*1024*1024;
set global lock_wait_timeout=1200;
set global innodb_lock_wait_timeout=1200;
set global fullsync_timeout=1200000;
set global enable_fullsync=false;
set global innodb_flush_log_at_trx_commit=2;
set global sync_binlog=0;
set global max_binlog_size=1*1024*1024*1024;

set global enable_fullsync=off;  #所有shard主节点关闭全同步
set enable_fullsync=off;    #所有shard主节点关闭全同步

set global general_log=on ;   #需要debug SQL时打开
免切设置为10800秒(Xpanel)
元数据集群Klustron-storage 节点参数调整:
export LD_LIBRARY_PATH=/nvme2/kunlun/instance_binaries/storage/57001/Klustron-storage-1.2.1/lib:$LD_LIBRARY_PATH ;
/nvme2/kunlun/instance_binaries/storage/57001/Klustron-storage-1.2.1/bin/mysql --connect-expired-password -S/nvme2/kunlun/storage_logdir/57001/mysql.sock -uroot -proot
set global innodb_buffer_pool_size=1*1024*1024*1024;    -- (缺省128M)
2.1.3. 调整BenchmarkSQL的配置,以适应Klustron数据的架构
修改BenchmarkSQL 的建表脚本(对表进行分区,指定分片)
cd benchmarksql5.0/run/sql.common

cat << EOF > tableCreates.sql
create table bmsql_config (
  cfg_name    varchar(30) primary key,
  cfg_value   varchar(50)
);
create table bmsql_warehouse (
  w_id        integer   not null,
  w_ytd       decimal(12,2),
  w_tax       decimal(4,4),
  w_name      varchar(10),
  w_street_1  varchar(20),
  w_street_2  varchar(20),
  w_city      varchar(20),
  w_state     char(2),
  w_zip       char(9)
) partition by hash(w_id);
create table bmsql_warehouse_0 partition of bmsql_warehouse for values with (MODULUS 6, REMAINDER 0) with (shard = 1);
create table bmsql_warehouse_1 partition of bmsql_warehouse for values with (MODULUS 6, REMAINDER 1) with (shard = 1);
create table bmsql_warehouse_2 partition of bmsql_warehouse for values with (MODULUS 6, REMAINDER 2) with (shard = 1);
create table bmsql_warehouse_3 partition of bmsql_warehouse for values with (MODULUS 6, REMAINDER 3) with (shard = 2);
create table bmsql_warehouse_4 partition of bmsql_warehouse for values with (MODULUS 6, REMAINDER 4) with (shard = 2);
create table bmsql_warehouse_5 partition of bmsql_warehouse for values with (MODULUS 6, REMAINDER 5) with (shard = 2);
create table bmsql_district (
  d_w_id       integer       not null,
  d_id         integer       not null,
  d_ytd        decimal(12,2),
  d_tax        decimal(4,4),
  d_next_o_id  integer,
  d_name       varchar(10),
  d_street_1   varchar(20),
  d_street_2   varchar(20),
  d_city       varchar(20),
  d_state      char(2),
  d_zip        char(9)
) partition by hash(d_w_id);
create table bmsql_district_0 partition of bmsql_district for values with (MODULUS 6, REMAINDER 0) with (shard = 1);
create table bmsql_district_1 partition of bmsql_district for values with (MODULUS 6, REMAINDER 1) with (shard = 1);
create table bmsql_district_2 partition of bmsql_district for values with (MODULUS 6, REMAINDER 2) with (shard = 1);
create table bmsql_district_3 partition of bmsql_district for values with (MODULUS 6, REMAINDER 3) with (shard = 2);
create table bmsql_district_4 partition of bmsql_district for values with (MODULUS 6, REMAINDER 4) with (shard = 2);
create table bmsql_district_5 partition of bmsql_district for values with (MODULUS 6, REMAINDER 5) with (shard = 2);
create table bmsql_customer (
  c_w_id         integer        not null,
  c_d_id         integer        not null,
  c_id           integer        not null,
  c_discount     decimal(4,4),
  c_credit       char(2),
  c_last         varchar(16),
  c_first        varchar(16),
  c_credit_lim   decimal(12,2),
  c_balance      decimal(12,2),
  c_ytd_payment  decimal(12,2),
  c_payment_cnt  integer,
  c_delivery_cnt integer,
  c_street_1     varchar(20),
  c_street_2     varchar(20),
  c_city         varchar(20),
  c_state        char(2),
  c_zip          char(9),
  c_phone        char(16),
  c_since        timestamp,
  c_middle       char(2),
  c_data         varchar(500)
) partition by hash(c_w_id);
create table bmsql_customer_0 partition of bmsql_customer for values with (MODULUS 6, REMAINDER 0) with (shard = 1);
create table bmsql_customer_1 partition of bmsql_customer for values with (MODULUS 6, REMAINDER 1) with (shard = 1);
create table bmsql_customer_2 partition of bmsql_customer for values with (MODULUS 6, REMAINDER 2) with (shard = 1);
create table bmsql_customer_3 partition of bmsql_customer for values with (MODULUS 6, REMAINDER 3) with (shard = 2);
create table bmsql_customer_4 partition of bmsql_customer for values with (MODULUS 6, REMAINDER 4) with (shard = 2);
create table bmsql_customer_5 partition of bmsql_customer for values with (MODULUS 6, REMAINDER 5) with (shard = 2);
create sequence bmsql_hist_id_seq;
create table bmsql_history (
  hist_id  integer,
  h_c_id   integer,
  h_c_d_id integer,
  h_c_w_id integer,
  h_d_id   integer,
  h_w_id   integer,
  h_date   timestamp,
  h_amount decimal(6,2),
  h_data   varchar(24)
) partition by hash(h_c_w_id);
create table bmsql_history_0 partition of bmsql_history for values with (MODULUS 6, REMAINDER 0) with (shard = 1);
create table bmsql_history_1 partition of bmsql_history for values with (MODULUS 6, REMAINDER 1) with (shard = 1);
create table bmsql_history_2 partition of bmsql_history for values with (MODULUS 6, REMAINDER 2) with (shard = 1);
create table bmsql_history_3 partition of bmsql_history for values with (MODULUS 6, REMAINDER 3) with (shard = 2);
create table bmsql_history_4 partition of bmsql_history for values with (MODULUS 6, REMAINDER 4) with (shard = 2);
create table bmsql_history_5 partition of bmsql_history for values with (MODULUS 6, REMAINDER 5) with (shard = 2);
create table bmsql_new_order (
  no_w_id  integer   not null,
  no_d_id  integer   not null,
  no_o_id  integer   not null
) partition by hash(no_w_id);
create table bmsql_new_order_0 partition of bmsql_new_order for values with (MODULUS 6, REMAINDER 0) with (shard = 1);
create table bmsql_new_order_1 partition of bmsql_new_order for values with (MODULUS 6, REMAINDER 1) with (shard = 1);
create table bmsql_new_order_2 partition of bmsql_new_order for values with (MODULUS 6, REMAINDER 2) with (shard = 1);
create table bmsql_new_order_3 partition of bmsql_new_order for values with (MODULUS 6, REMAINDER 3) with (shard = 2);
create table bmsql_new_order_4 partition of bmsql_new_order for values with (MODULUS 6, REMAINDER 4) with (shard = 2);
create table bmsql_new_order_5 partition of bmsql_new_order for values with (MODULUS 6, REMAINDER 5) with (shard = 2);
create table bmsql_oorder (
  o_w_id       integer      not null,
  o_d_id       integer      not null,
  o_id         integer      not null,
  o_c_id       integer,
  o_carrier_id integer,
  o_ol_cnt     integer,
  o_all_local  integer,
  o_entry_d    timestamp
) partition by hash(o_w_id);
create table bmsql_oorder_0 partition of bmsql_oorder for values with (MODULUS 6, REMAINDER 0) with (shard = 1);
create table bmsql_oorder_1 partition of bmsql_oorder for values with (MODULUS 6, REMAINDER 1) with (shard = 1);
create table bmsql_oorder_2 partition of bmsql_oorder for values with (MODULUS 6, REMAINDER 2) with (shard = 1);
create table bmsql_oorder_3 partition of bmsql_oorder for values with (MODULUS 6, REMAINDER 3) with (shard = 2);
create table bmsql_oorder_4 partition of bmsql_oorder for values with (MODULUS 6, REMAINDER 4) with (shard = 2);
create table bmsql_oorder_5 partition of bmsql_oorder for values with (MODULUS 6, REMAINDER 5) with (shard = 2);
create table bmsql_order_line (
  ol_w_id         integer   not null,
  ol_d_id         integer   not null,
  ol_o_id         integer   not null,
  ol_number       integer   not null,
  ol_i_id         integer   not null,
  ol_delivery_d   timestamp,
  ol_amount       decimal(6,2),
  ol_supply_w_id  integer,
  ol_quantity     integer,
  ol_dist_info    char(24)
) partition by hash(ol_w_id);
create table bmsql_order_line_0 partition of bmsql_order_line for values with (MODULUS 6, REMAINDER 0) with (shard = 1);
create table bmsql_order_line_1 partition of bmsql_order_line for values with (MODULUS 6, REMAINDER 1) with (shard = 1);
create table bmsql_order_line_2 partition of bmsql_order_line for values with (MODULUS 6, REMAINDER 2) with (shard = 1);
create table bmsql_order_line_3 partition of bmsql_order_line for values with (MODULUS 6, REMAINDER 3) with (shard = 2);
create table bmsql_order_line_4 partition of bmsql_order_line for values with (MODULUS 6, REMAINDER 4) with (shard = 2);
create table bmsql_order_line_5 partition of bmsql_order_line for values with (MODULUS 6, REMAINDER 5) with (shard = 2);
create table bmsql_item (
  i_id     integer      not null,
  i_name   varchar(24),
  i_price  decimal(5,2),
  i_data   varchar(50),
  i_im_id  integer
) with (shard = all);
create table bmsql_stock (
  s_w_id       integer       not null,
  s_i_id       integer       not null,
  s_quantity   integer,
  s_ytd        integer,
  s_order_cnt  integer,
  s_remote_cnt integer,
  s_data       varchar(50),
  s_dist_01    char(24),
  s_dist_02    char(24),
  s_dist_03    char(24),
  s_dist_04    char(24),
  s_dist_05    char(24),
  s_dist_06    char(24),
  s_dist_07    char(24),
  s_dist_08    char(24),
  s_dist_09    char(24),
  s_dist_10    char(24)
) partition by hash(s_w_id);
create table bmsql_stock_0 partition of bmsql_stock for values with (MODULUS 6, REMAINDER 0) with (shard = 1);
create table bmsql_stock_1 partition of bmsql_stock for values with (MODULUS 6, REMAINDER 1) with (shard = 1);
create table bmsql_stock_2 partition of bmsql_stock for values with (MODULUS 6, REMAINDER 2) with (shard = 1);
create table bmsql_stock_3 partition of bmsql_stock for values with (MODULUS 6, REMAINDER 3) with (shard = 2);
create table bmsql_stock_4 partition of bmsql_stock for values with (MODULUS 6, REMAINDER 4) with (shard = 2);
create table bmsql_stock_5 partition of bmsql_stock for values with (MODULUS 6, REMAINDER 5) with (shard = 2);
alter table bmsql_warehouse add constraint warehouse_pkey primary key (w_id);
alter table bmsql_district add constraint district_pkey   primary key (d_w_id, d_id);
alter table bmsql_customer add constraint customer_pkey  primary key (c_w_id, c_d_id, c_id);
create index bmsql_customer_idx1  on  bmsql_customer (c_w_id, c_d_id, c_last, c_first);
alter table bmsql_oorder add constraint oorder_pkey  primary key (o_w_id, o_d_id, o_id);
create unique index bmsql_oorder_idx1  on  bmsql_oorder (o_w_id, o_d_id, o_carrier_id, o_id);
alter table bmsql_new_order add constraint new_order_pkey  primary key (no_w_id, no_d_id, no_o_id);
alter table bmsql_order_line add constraint order_line_pkey  primary key (ol_w_id, ol_d_id, ol_o_id, ol_number);
alter table bmsql_stock add constraint stock_pkey  primary key (s_w_id, s_i_id);
alter table bmsql_item add constraint item_pkey  primary key (i_id);
EOF
mv indexCreates.sql indexCreates.sql_old
mv foreignKeys.sql foreignKeys.sql.bak
修改:/home/kunlun/benchmarksql-5.0/run/sql.postgres/extraHistID.sql ,将
alter table bmsql_history add primary key (hist_id);
修改为:
alter table bmsql_history add primary key (hist_id,h_c_w_id);
mv /home/kunlun/benchmarksql-5.0/run/sql.postgres/buildFinish.sql /home/kunlun/benchmarksql-5.0/run/sql.postgres/buildFinish.sql.bak
2.1.4. 在Klustron数据中创建测试库bench和测试用户bench
postgres=# create user bench with password 'bench';

postgres=# create database bench with owner bench ;
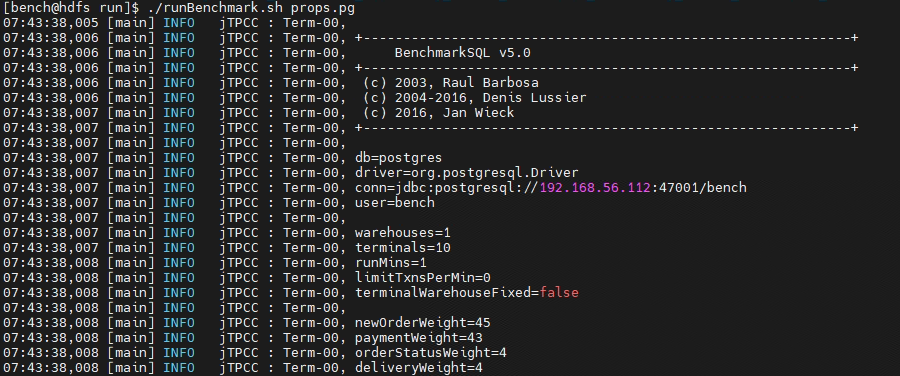
2.1.5. 修改benchmarksql5.0/run/props.pg的参数
db=postgres
driver=org.postgresql.Driver
conn=jdbc:postgresql://192.168.0.20:47001/bench50
user=bench50
password=bench50

warehouses=50
loadWorkers=50

terminals=20
//To run specified transactions per terminal- runMins must equal zero
runTxnsPerTerminal=0
//To run for specified minutes- runTxnsPerTerminal must equal zero
runMins=1
//Number of total transactions per minute
limitTxnsPerMin=0

//Set to true to run in 4.x compatible mode. Set to false to use the
//entire configured database evenly.
terminalWarehouseFixed=false

//The following five values must add up to 100
//The default percentages of 45, 43, 4, 4 & 4 match the TPC-C spec
newOrderWeight=45
paymentWeight=43
orderStatusWeight=4
deliveryWeight=4
stockLevelWeight=4

// Directory name to create for collecting detailed result data.
// Comment this out to suppress.
resultDirectory=my_result_%tY-%tm-%td_%tH%tM%tS
osCollectorScript=./misc/os_collector_linux.py
osCollectorInterval=1
osCollectorSSHAddr=kunlun@192.168.0.21
osCollectorDevices=net_enp4s0 blk_ nvme1n1
2.1.6. 执行测试数据生成
cd benchmarksql5.0/run/
./runDatabaseBuild.sh props.pg
2.1.7. 对测试数据表及列做一次分析,收集统计信息
将 tableCreates.sql拷贝至计算节点,并在当前目录下编辑一个名为ana.sh的脚本,如下:
for i in `cat ./tableCreates.sql | grep 'create table' | grep -v partition | awk '{print $3}'`
do
        echo "select * from $i limit 1;" > a.sql
        clomun=`psql -h 192.168.0.20 -p 47001 -U bench bench  -f a.sql | sed -n 1p | sed 's/|/,/g'`
        analyze="analyze $i($clomun)"
        echo $analyze
        echo $analyze > tmp.sql
        psql -h 192.168.0.20 -p 47001 -U bench bench  -f tmp.sql
done
运行该脚本完成对所有测试表的统计分析。
2.1.8. 对所有存储节点做一次事务清理,编辑一个名为xa.sh 的脚本 ,内容如下
echo 'xa recover'> tmp.sql
echo $1
for i in `mysql -h 192.168.0.$1 -ppgx_pwd -upgx -P$2 < tmp.sql | awk '{print $4}' | sed '1d'`
do
        printf "xa rollback \'$i\'" > tmp.sql
        echo "========$i========"
        mysql -h 192.168.0.$1 -ppgx_pwd -upgx -P$2 < tmp.sql
done
将其拷贝到存储节点shard1(192.168.0,21), shard2(192.168.0.22) ,并输入对应的参数,完成脚本执行。
例:
sh xa.sh 21 57003
2.2. 进行测试
执行 runBenchMark.sh props.pg, 将有类似如下信息输出:
压测完成后,在当前目录会生成类似:my_result_2023-04-16_074338 的目录
2.3. 测试报告生成及结果阅读
执行generateReport.sh < my_result目录>将生成html分析报告,以当前配置的压测用例(warehouses=50,terminals=20,runMins=1)在报告文件中获得的关键输出信息如下:
| Transaction Type | Latency | Count | Percent | Rollback | Errors | Skipped Deliveries | |
|---|---|---|---|---|---|---|---|
| 90th % | Maximum | ||||||
| NEW_ORDER | 0.222s | 1.255s | 12903 | 44.794% | 0.930% | 0 | N/A |
| PAYMENT | 0.013s | 1.042s | 12383 | 42.989% | N/A | 0 | N/A |
| ORDER_STATUS | 0.004s | 0.418s | 1237 | 4.294% | N/A | 0 | N/A |
| STOCK_LEVEL | 0.025s | 1.067s | 1153 | 4.003% | N/A | 0 | N/A |
| DELIVERY | 0.000s | 0.001s | 1129 | 3.919% | N/A | 0 | N/A |
| DELIVERY_BG | 0.250s | 1.096s | 1129 | N/A | N/A | 0 | 0 |
Overall tpmC: 12903.00
Overall tpmTotal: 28805.00
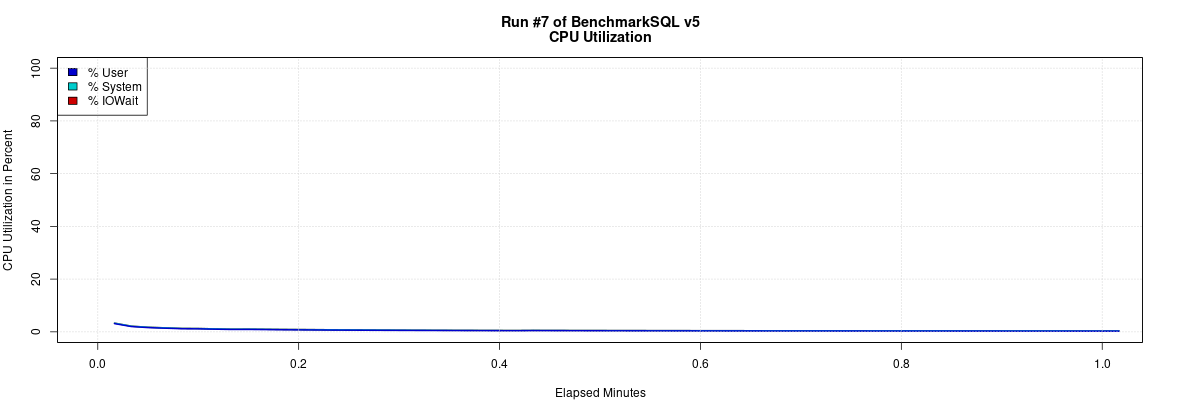
Klustron存储节点(192.168.0.21)所在机器的负载监测情况如下:
2.4. 对压测设定不同的并发数:20, 50,100,200获得如下的统计结果
| 并发用户数 | tpmC | tpmTotal | 备注 |
|---|---|---|---|
| 20 | 12765.76 | 28499.62 | |
| 50 | 37030.55 | 81530.63 | |
| 100 | 69464.26 | 154490.6 | |
| 200 | 66644.32 | 148092.77 |
500warehouses
| 并发用户数 | tpmC | tpmTotal | 备注 |
|---|---|---|---|
| 50 | 31018.69 | 68931.3 | |
| 100 | 57587.56 | 128006.8 | |
| 200 | 59698.94 | 131773.86 | |
| 400 | 33875.61 | 75435.1 | |
| 600 | 26498.45 | 58929.34 | |
| 800 | 22157.08 | 48785.76 |
03 TPCC性能测试对比结果汇总
50warehouses 对比
| 并发用户数 | Klustron | Oracle | 备注 | ||
|---|---|---|---|---|---|
| tpmC | tpmTotal | tpmC | tpmTotal | ||
| 20 | 12765.76 | 28499.62 | 78995.64 | 175990.89 | |
| 50 | 37030.55 | 81530.63 | 84918.44 | 188703.54 | |
| 100 | 69464.26 | 154490.6 | 97179.37 | 215940.76 | |
| 200 | 66644.32 | 148092.77 | 96457.92 | 214142.63 |
500 warehouses对比
| 并发用户数 | Klustron | Oracle | 备注 | ||
|---|---|---|---|---|---|
| tpmC | tpmTotal | tpmC | tpmTotal | ||
| 50 | 31018.69 | 68931.3 | 136071.81 | 302484.41 | |
| 100 | 57587.56 | 128006.8 | 149889.71 | 332070.93 | |
| 200 | 59698.94 | 131773.86 | 98523.34 | 218430.36 | |
| 400 | 33875.61 | 75435.1 | 62831.25 | 139880.84 | |
| 600 | 26498.45 | 58929.34 | 87321.82 | 194175.92 | |
| 800 | 22157.08 | 48785.76 | 76169.41 | 169711.68 |
结果分析
由于Oracle没有备机,因此Klustron的 shard 也没有带备机,因此省去了fullsync等待备机ack的延时,一般在10ms左右。
关键设置是一致的
由于 Oracle 的COMMIT_WAIT的文档 里面的如下解释,
If the parameter is set to FORCE_WAIT, the default behavior (immediate flushing of the redo log buffer with wait) is used.
但是Oracle文档并未提及会fsync文件到持久存储, 也就是说Oracle的默认行为就是相当于Klustron-storage的如下设置: a. sync_binlog=0,也就是在一组事务写入binlog到binlog文件后,不fsync文件到存储介质; b. innodb_flush_log_at_trx_commit=2,也就是flush redo log buffer 到redo log文件,
因此我们设置了每个 shard 的kunlun-storage节点的innodb_flush_log_at_trx_commit=2 和 sync_binlog=0. 因此在IO 延时和开销方面Klustron与Oracle是对齐的。
- 由于Klustron多了一层计算节点,可以看到Klustron的tpmc相当于Oracle的2/3。
不过如果数据量非常大,以至于单个服务器的计算资源无法承载,那么此时Klustron 将可以水平扩容,DBA通过增加服务器来增加Klustron集群整体吞吐率,并且能保持延时平稳。但是Oracle 数据库的吞吐率就无法提升了。Klustron分布式数据库相当于是一列动车,可以按需增加车厢数来增加运载能力,并且每节车厢自带动力因此性能线性扩展;而单机数据库类似一个卡车,满载后就无法再增加运载能力了。
- Oracle和Klustron都面临连接数增加后性能下降的问题。
不过Oracle在超过100个连接后性能就开始下降了,而Klustron可以达到200个连接性能才开始下降。 这主要是因为Oracle和Klustron的计算节点都是多进程架构,随着进程数增加,Linux的任务调度算法分给每个进程(或者线程,在Linux中都是task)的时间片不得不减少,否则一个进程在获得两个时间片之间的等待时间间隔就会过大。不过,每个进程分得的时间片也有一个下限,因为假如这个时间片无限减少的话,每个进程都将没有机会执行就又要再次做context Switch,那样的话进程的切换开销就变成了操作系统的主要开销。于是,结果就是同一个服务器中进程数很多之后,这些进程的性能下降会很明显,执行语句延时变大,进程切换开销占比也会增加一些,系统整体吞吐量却减少了。
Klustron的计算节点未来也会变成线程池架构,以避免上述问题,做到连接数过千也可以保持性能平稳。