
Klustron在线搬迁表与多计算节点一致性能力
Klustron在线搬迁表与多计算节点一致性能力
注意:
如无特别说明,文中的版本号可以使用任何已发布版本的版本号代替。所有已发布版本详见:Release_notes。
概述
本文展示了Klustron的弹性扩缩容对于应用系统没有可察觉的影响,更无需应用系统停服。应用系统连接多个计算节点对表进行增删改查操作,与此同时搬迁表的部分分区到新添加的Shard上,最后确认Klustron在线搬迁表对多节点的应用几乎没有影响。
所有的测试都是通过XPanel控制台和PostgreSQL客户端连接数据库集群。XPanel服务安装的服务器IP是192.168.56.112。在能访问192.168.56.112的机器上打开浏览器,输入地址:http://192.168.56.112:18080/KunlunXPanel/#/login?redirect=%2Fdashboard
初次登录用户名和密码是:super_dba/super_dba,初次登陆需要修改super_dba密码。
登录后首页显示如下:
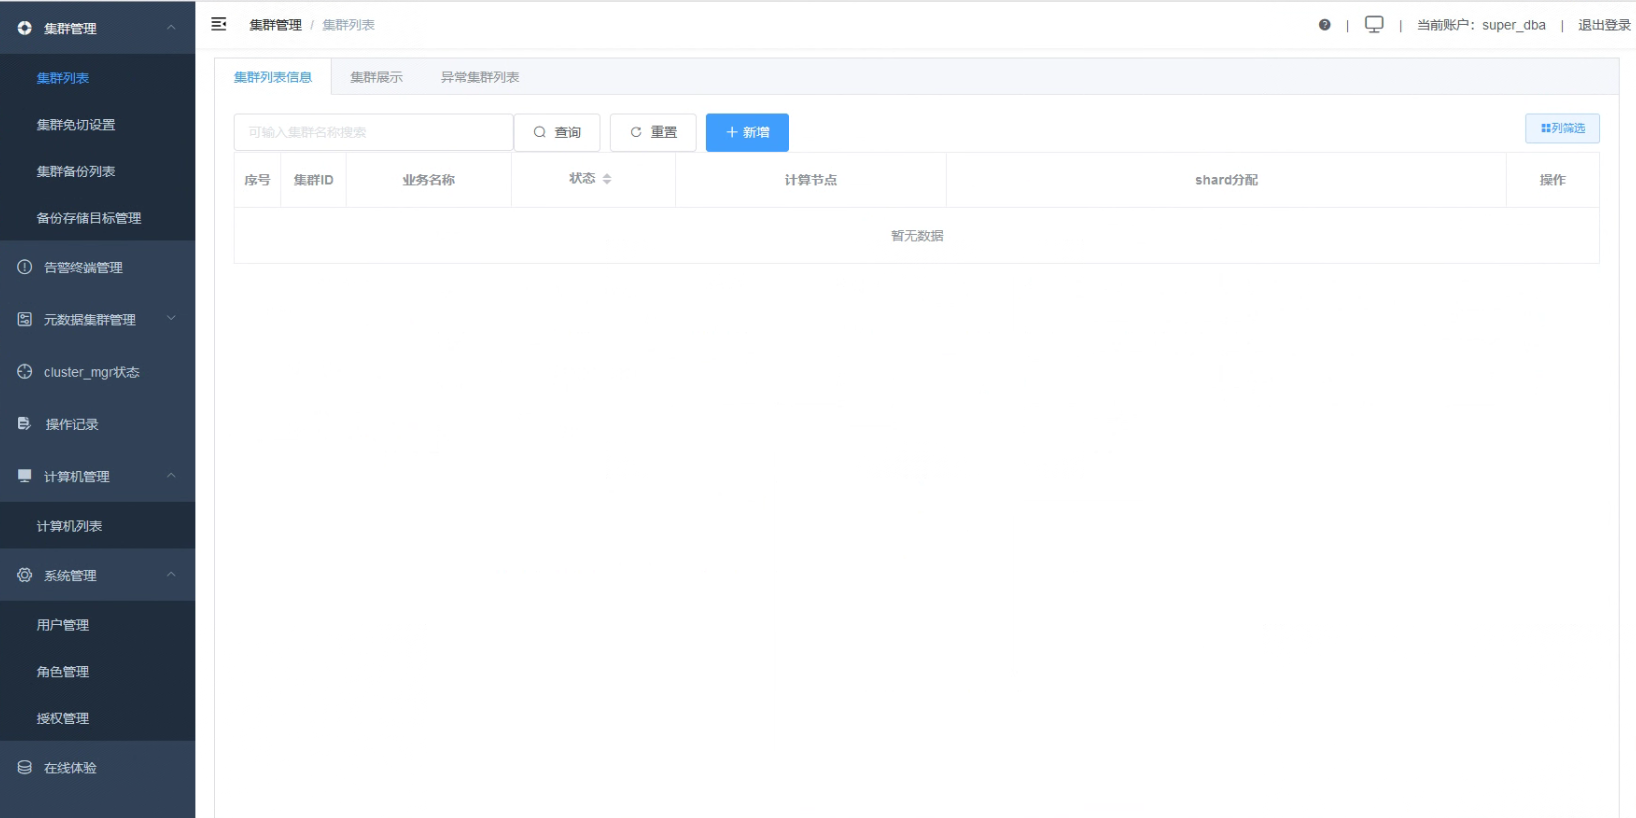
01 创建集群
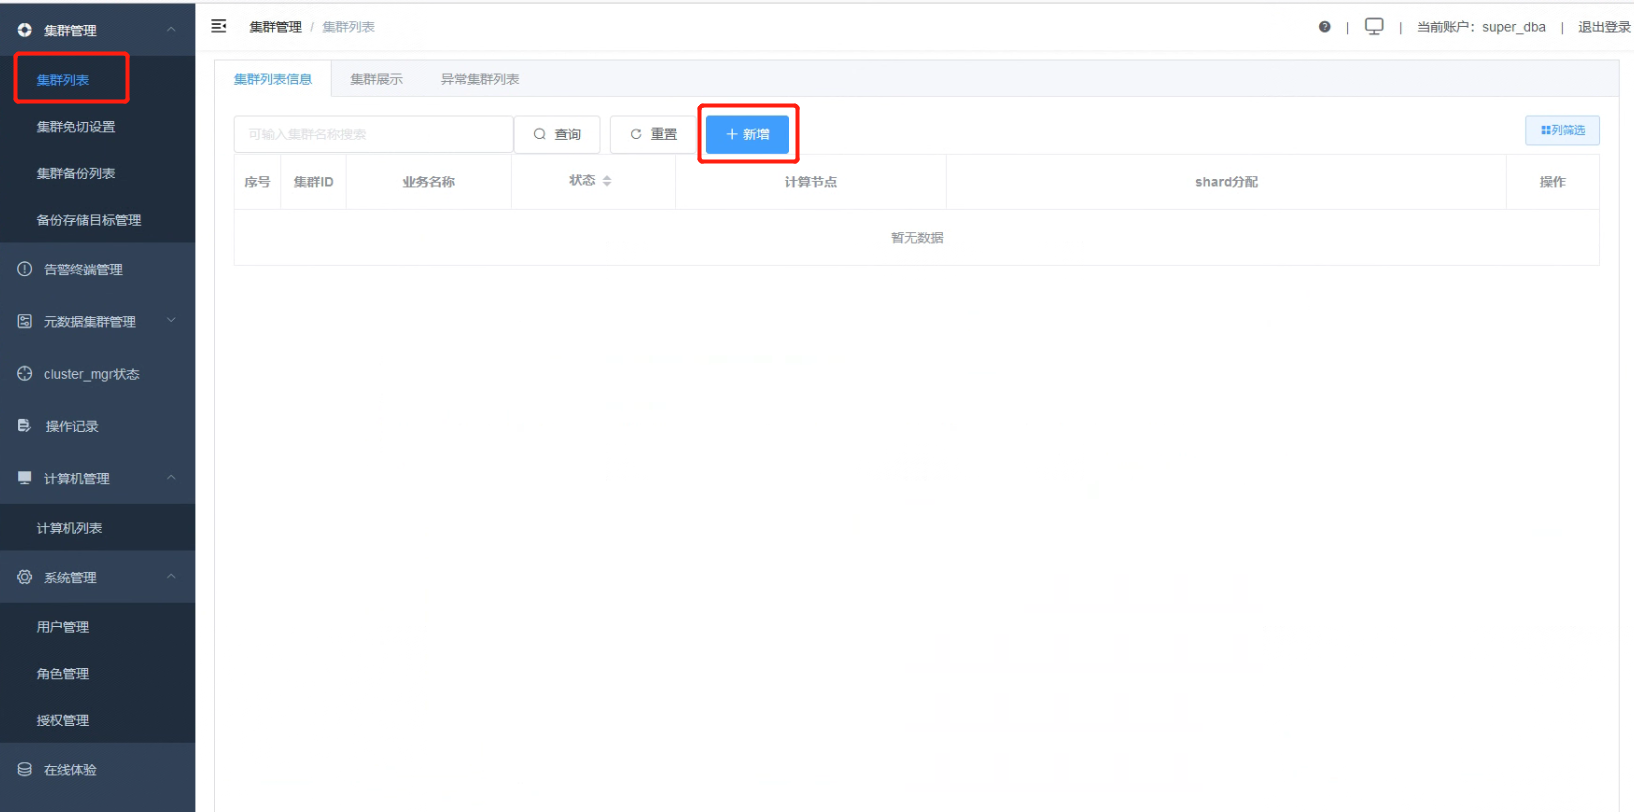
1.1 点击“集群管理”、“集群列表”,集群列表界面点击“新增”按钮。
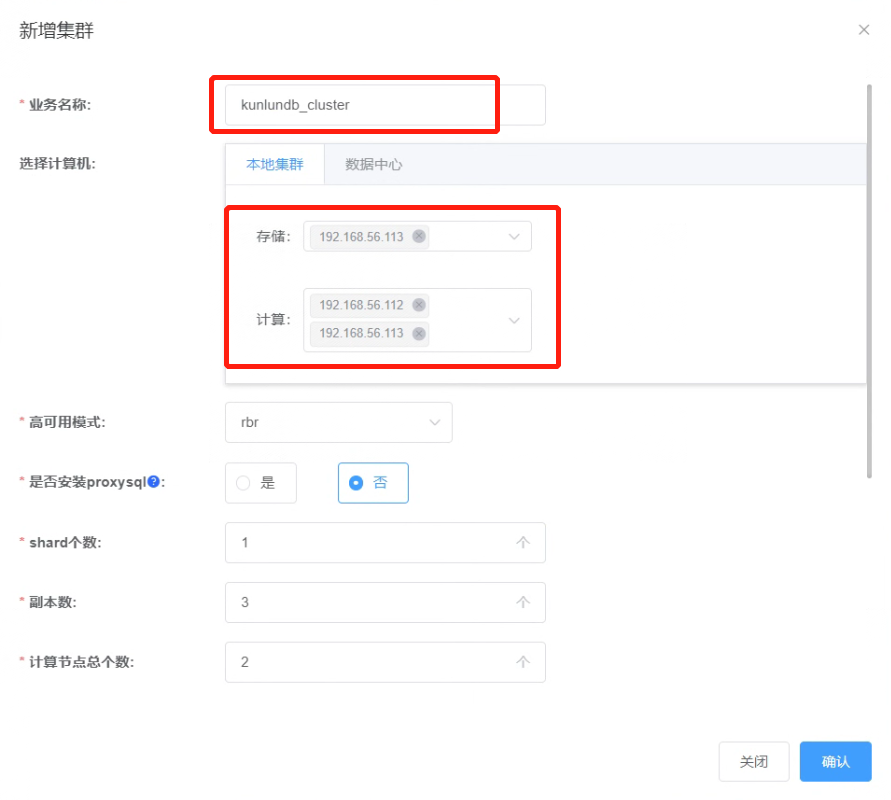
1.2 添加集群参数如下图:
1.3 点击“确认”,查看创建集群任务的完成情况。
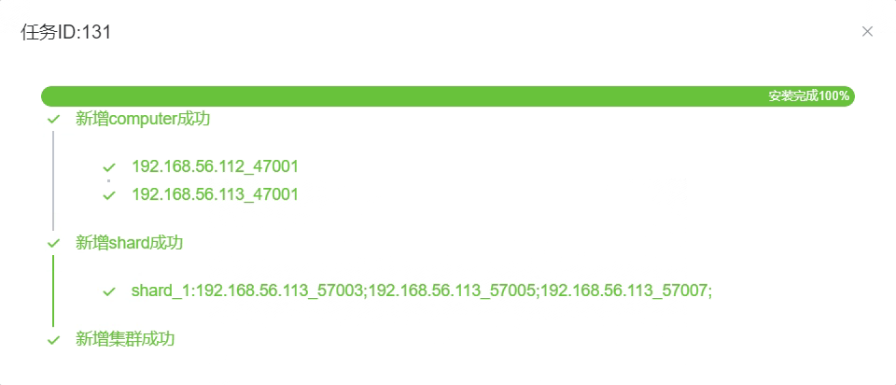
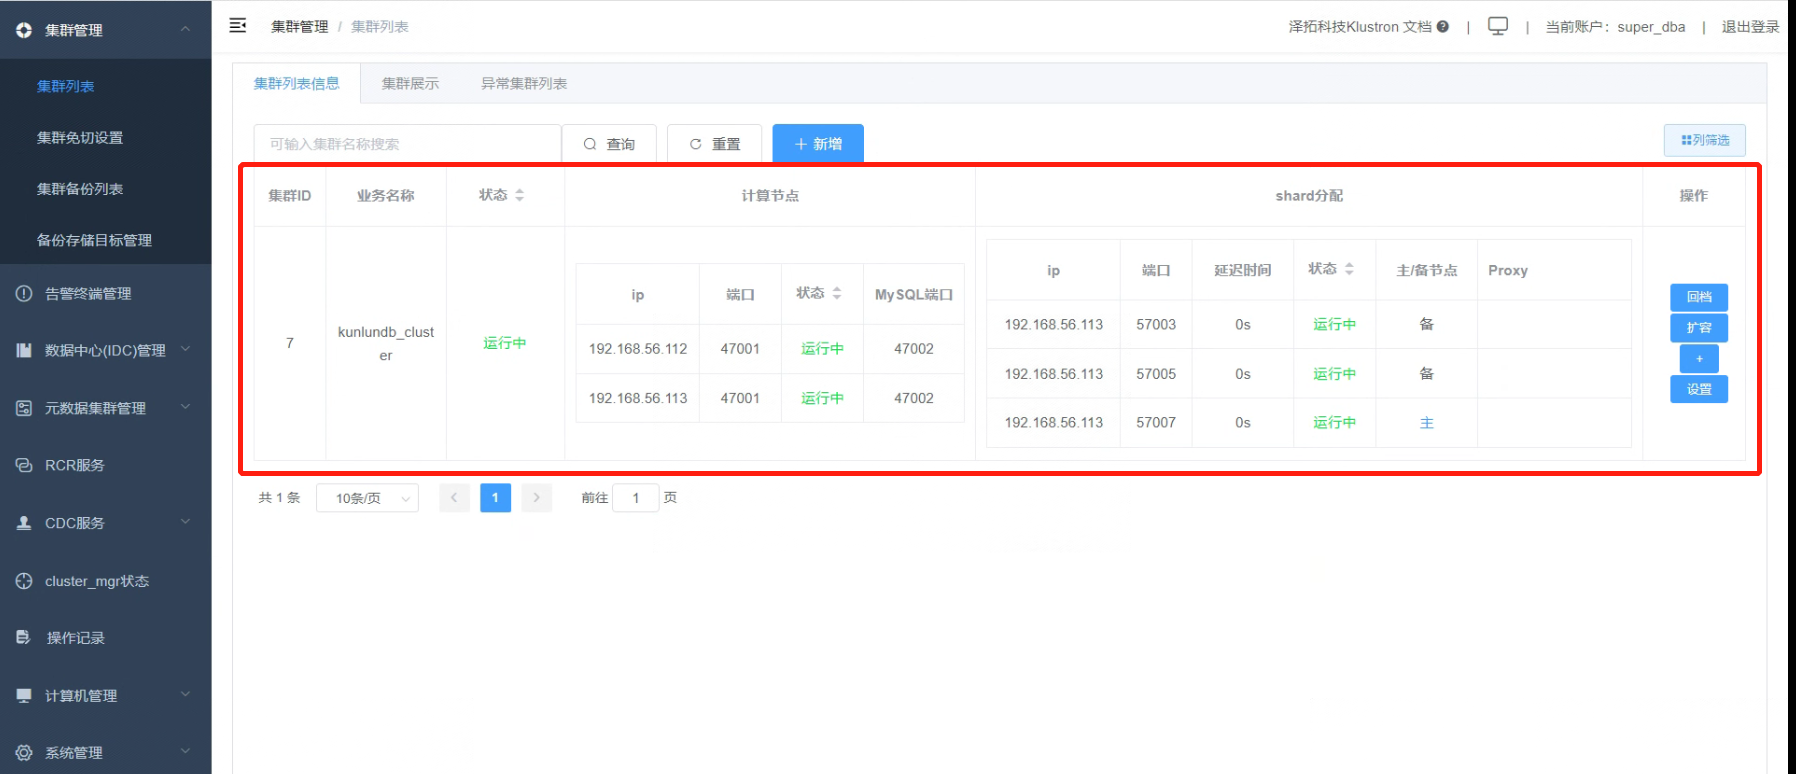
1.4 所有状态都是“运行中”, 集群创建完成。
02 准备试验数据
2.1 打开一个连向集群kunlundb_cluster(计算节点IP:192.168.56.112)的ssh终端窗口,以kunlun用户身份登陆该主机,然后用PostgreSQL客户端连接集群数据库。
[root@kunlun1 ~]# su - kunlun
[kunlun@kunlun1 ~]$ source /kunlun/env.sh
[kunlun@kunlun1 ~]$ psql -h 192.168.56.112 -p 47001 -U abc postgres
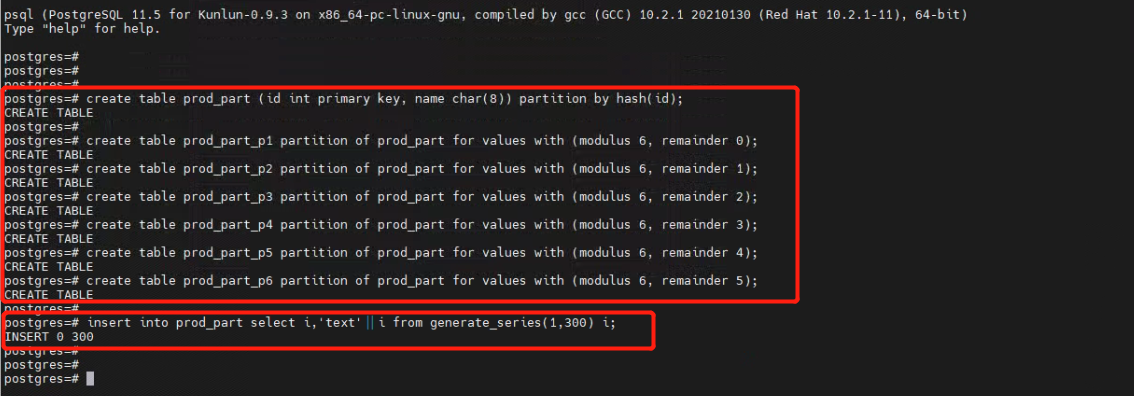
2.2 在数据库中创建测试表,并插入测试数据。
postgres=# create table prod_part (id int primary key, name char(8)) partition by hash(id);
postgres=# create table prod_part_p1 partition of prod_part for values with (modulus 6, remainder 0);
postgres=# create table prod_part_p2 partition of prod_part for values with (modulus 6, remainder 1);
postgres=# create table prod_part_p3 partition of prod_part for values with (modulus 6, remainder 2);
postgres=# create table prod_part_p4 partition of prod_part for values with (modulus 6, remainder 3);
postgres=# create table prod_part_p5 partition of prod_part for values with (modulus 6, remainder 4);
postgres=# create table prod_part_p6 partition of prod_part for values with (modulus 6, remainder 5);
postgres=# insert into prod_part select i,'text'||i from generate_series(1,300) i;
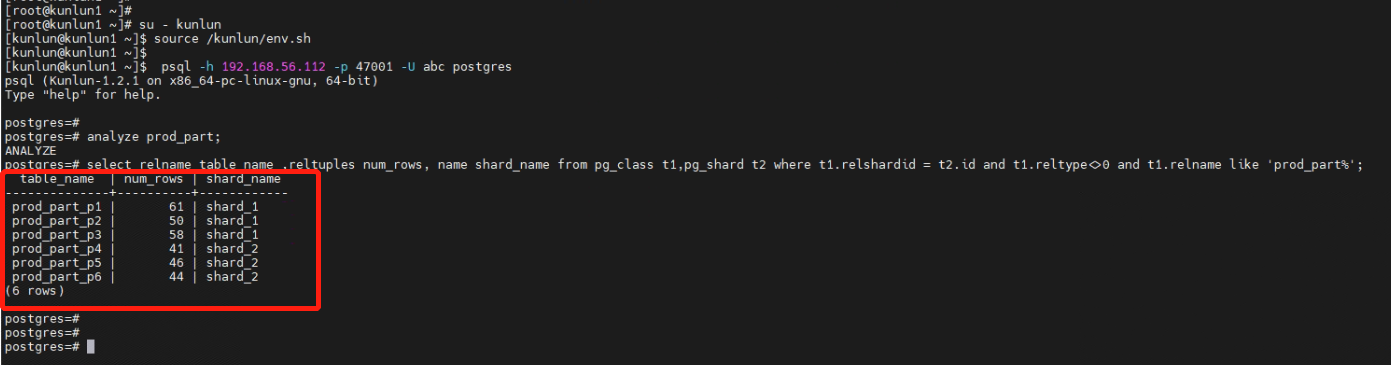
2.3 查看数据的分布情况。
postgres=# analyze prod_part;
postgres=# select relname table_name ,reltuples num_rows, name shard_name from pg_class t1,pg_shard t2 where t1.relshardid = t2.id and t1.reltype<>0 and t1.relname like 'prod_part%';

从上面可以看到分区表prod_part中,prod_part_p1、prod_part_p2、prod_part_p3、prod_part_p4、prod_part_p5和prod_part_p6所有的分区都存放在存储节点shard_1上。
03 集群扩容存储****shard 节点
3.1 增加存储 shard 节点
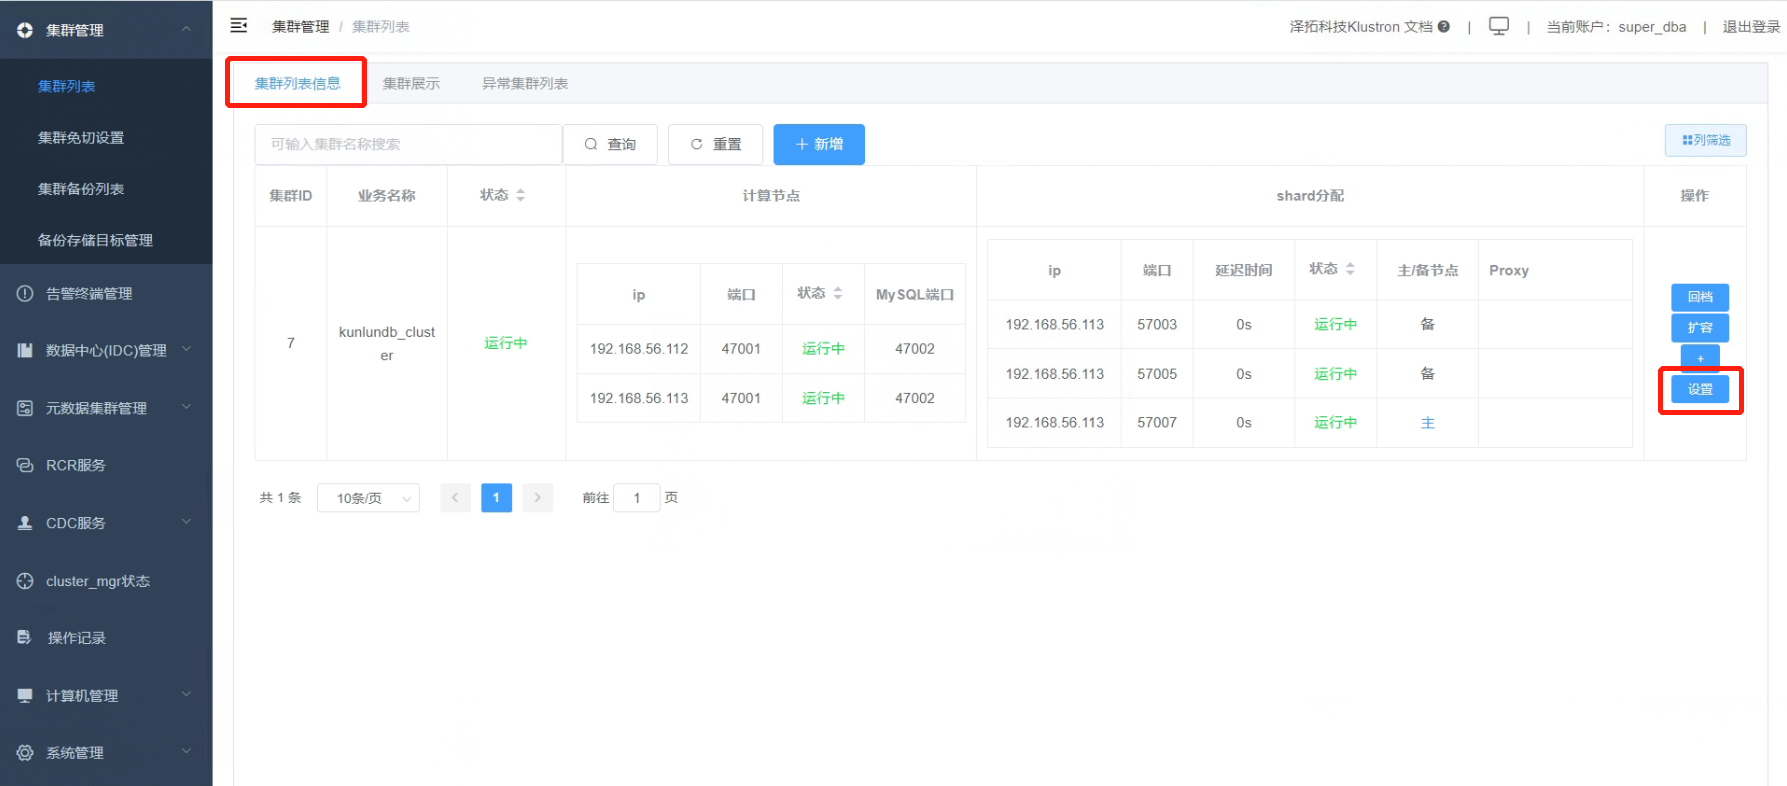
3.1.1 在集群列表信息,对需要增加存储shard节点的集群点击“设置”或“+”按钮。
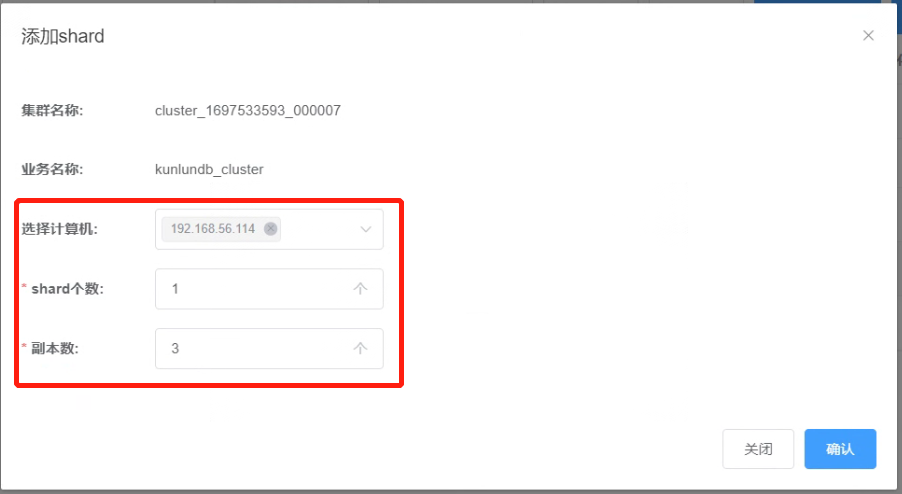
3.1.2 在“集群设置”中点击“shard列表”,然后点击“添加shard”按钮。

3.1.3 添加shard节点参数如下图。
3.1.4 点击“确认”,查看添加shard节点任务的完成情况。
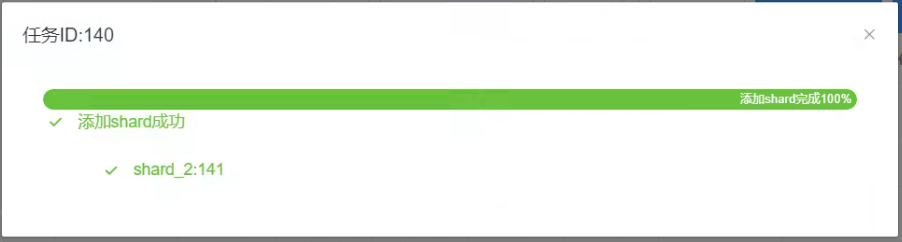
3.1.5 检查存储shard节点shard_2已添加到集群。

3.2 扩容存储 shard 节点
3.2.1 打开两个访问数据库窗口,各准备一个python脚本访问数据库,第一个窗口准备pyprod1.py脚本访问计算节点一(这里计算节点一服务器是192.168.56.112),在集群做存储shard节点扩容的同时对集群数据库持续select查询操作,pyprod1.py脚本内容如下:
import psycopg2.extras
from psycopg2 import DatabaseError
import time
import datetime

conn = psycopg2.connect(database='postgres',user='abc',
                 password='abc',host='192.168.56.112',port='47001')
select_sql = ''' select * from prod_part where id=%s; '''

i = 1
try:
    while (i <= 1000) :
        cursor = conn.cursor(cursor_factory=psycopg2.extras.RealDictCursor)
        cursor.execute(select_sql,[i])
        res = cursor.fetchall()
        print(dict(res[0]))
        current_datetime = datetime.datetime.now()
        print("Select当前日期和时间:", current_datetime)
        if (i == 1000) :
            i = 1
        else :
            i = i+1
        cursor.close()
        conn.commit()
        time.sleep(1)
except (Exception, DatabaseError) as e:
    print(e)
    input('Press any key and Enter to continue ~!')
    conn = psycopg2.connect(database='postgres', user='abc',
                            password='abc', host='192.168.56.112', port='47001')
    select_sql = ''' select * from prod_part where id=%s; '''
    while (i <= 1000):
        cursor = conn.cursor(cursor_factory=psycopg2.extras.RealDictCursor)
        cursor.execute(select_sql, [i])
        res = cursor.fetchall()
        print(dict(res[0]))
        current_datetime = datetime.datetime.now()
        print("Select当前日期和时间:", current_datetime)
        if (i == 1000):
            i = 1
        else:
            i = i + 1
        cursor.close()
        conn.commit()
        time.sleep(1)
finally:
    conn.close()
3.2.2 第二个窗口准备pyprod2.py脚本访问计算节点二(这里计算节点二服务器是192.168.56.113),在集群做存储shard节点扩容的同时对集群数据库持续update更新操作,pyprod2.py脚本内容如下:
import psycopg2.extras
from psycopg2 import DatabaseError
import time
import datetime

conn = psycopg2.connect(database='postgres',user='abc',
                 password='abc',host='192.168.56.113',port='47001')
update_sql = ''' update prod_part set name='test' where id=%s; '''

i = 1
try:
    while (i <= 1000) :
        cursor = conn.cursor(cursor_factory=psycopg2.extras.RealDictCursor)
        cursor.execute(update_sql,[i])
        current_datetime = datetime.datetime.now()
        print("Update当前日期和时间:", current_datetime)
        if (i == 1000) :
            i = 1
        else :
            i = i+1
        cursor.close()
        conn.commit()
        time.sleep(1)
except (Exception, DatabaseError) as e:
    print(e)
    input('Press any key and Enter to continue ~!')
    conn = psycopg2.connect(database='postgres', user='abc',
                            password='abc', host='192.168.56.113', port='47001')
    update_sql = ''' update prod_part set name= 'test' where id=%s; '''
    while (i <= 1000):
        cursor = conn.cursor(cursor_factory=psycopg2.extras.RealDictCursor)
        cursor.execute(update_sql, [i])
        current_datetime = datetime.datetime.now()
        print("Update当前日期和时间:", current_datetime)
        if (i == 1000):
            i = 1
        else:
            i = i + 1
        cursor.close()
        conn.commit()
        time.sleep(1)
finally:
    conn.close()
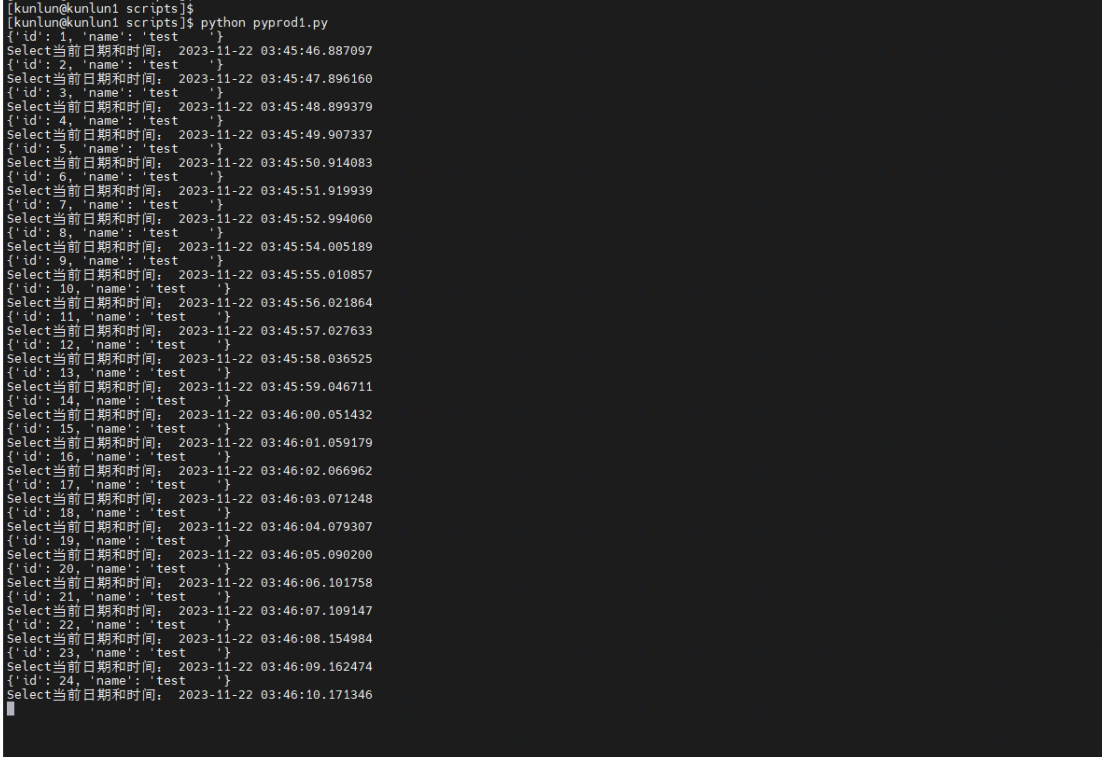
3.2.3 在第一个命令行运行pyprod1.py脚本,持续对数据库进行select查询操作
[kunlun@kunlun1 scripts]$ python pyprod1.py
3.2.4 同时在第二个窗口运行pyprod2.py脚本,持续对数据库进行update更新操作
[kunlun@kunlun1 scripts]$ python pyprod2.py

3.2.5 在集群列表信息栏,对需要做shard之间表分区转移的集群,点击“扩容”按钮。

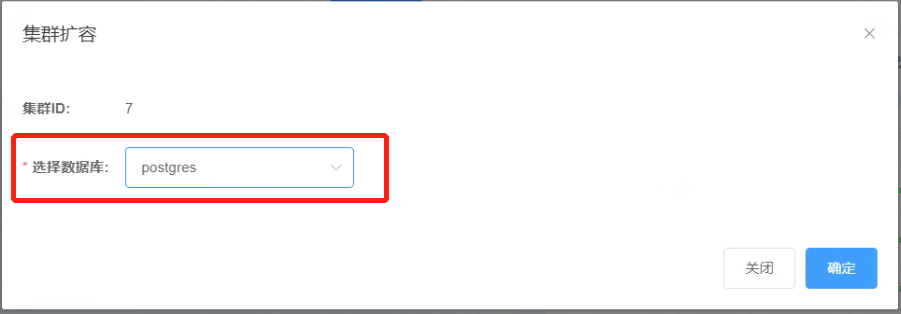
3.2.6 在集群扩容“选择数据库”的下拉列表选择需要扩容的数据库,然后点击 “确定”按钮。例如本示例“postgres”数据库。
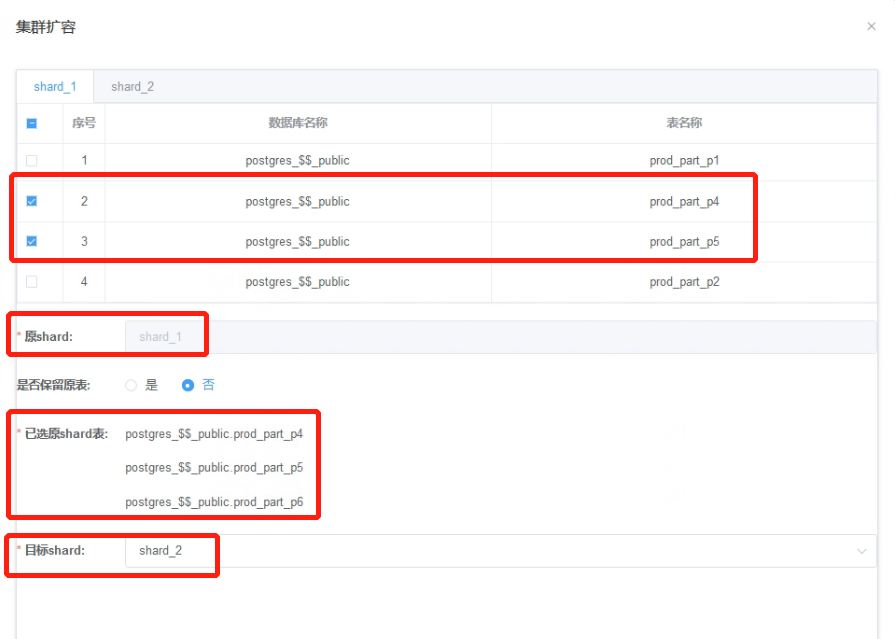
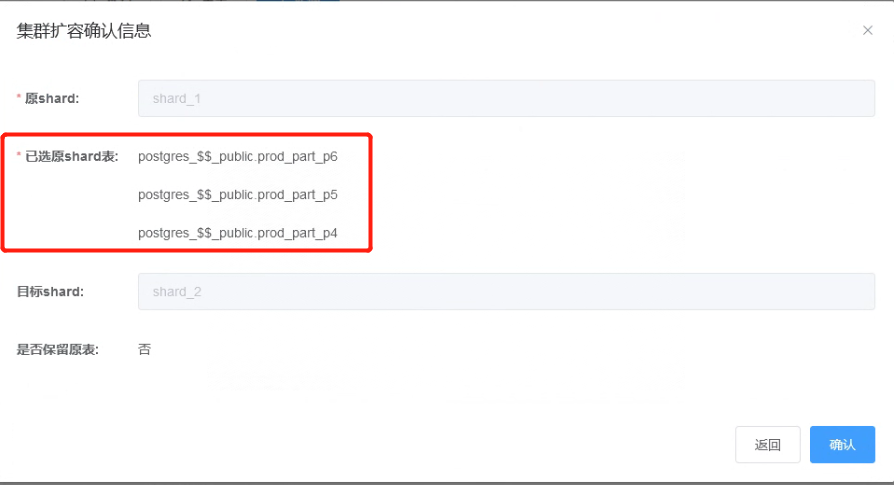
3.2.7 选择要从shard_1要移动到shard_2上的表,这里选择了prod_part_p4、prod_part_p5、prod_part_p6三张分区表;在是否保留原表选择“否”,目标shard选择“shard_2”,然后点击“提交”。
3.2.8 在集群扩容确认信息界面点击“确认”按钮,开始进行集群扩容。
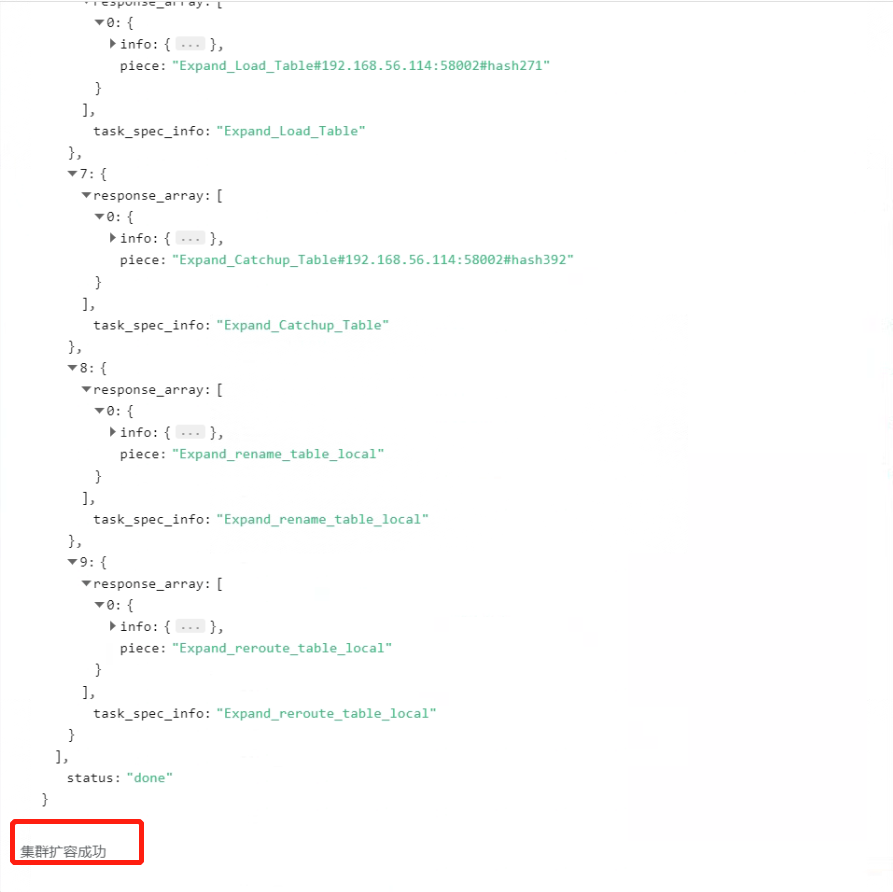
3.2.9 扩容成功。
3.2.10 在扩容的过程中,表的移动过程中,select查询操作一直可以访问操作的这些表。

3.2.11 在扩容的过程中,表的移动过程中,update更新操作一直可以访问操作的这些表。

3.3 扩容后数据校验
3.3.1 打开一个连向集群kunlundb_cluster(计算节点IP:192.168.56.112)的ssh终端窗口,以kunlun用户身份登陆该主机,然后用PostgreSQL客户端连接集群,执行数据查询指令。
[root@kunlun1 ~]# su - kunlun
[kunlun@kunlun1 ~]$ source /kunlun/env.sh
[kunlun@kunlun1 ~]$ psql -h 192.168.56.112 -p 47001 -U abc postgres
3.3.2 查看数据的分布情况。
postgres=# analyze prod_part;
postgres=# select relname table_name ,reltuples num_rows, name shard_name from pg_class t1,pg_shard t2 where t1.relshardid = t2.id and t1.reltype<>0 and t1.relname like 'prod_part%';
连接到计算节点192.168.56.112节点上可以看到分区表prod_part中,prod_part_p1、prod_part_p2和prod_part_p3分区存放在存储节点shard_1上,而prod_part_p4、prod_part_p5和prod_part_p6分区已扩容存放到存储节点shard_2上。
3.3.3 打开另外一个连向集群kunlundb_cluster(计算节点IP:192.168.56.113)的ssh终端窗口,以kunlun用户身份登陆该主机,然后用PostgreSQL客户端连接集群,执行数据查询指令。
[root@kunlun1 ~]# su - kunlun
[kunlun@kunlun1 ~]$ source /kunlun/env.sh
[kunlun@kunlun1 ~]$ psql -h 192.168.56.113 -p 47001 -U abc postgres
3.3.4 查看数据的分布情况。
postgres=# analyze prod_part;
postgres=# select relname table_name ,reltuples num_rows, name shard_name from pg_class t1,pg_shard t2 where t1.relshardid = t2.id and t1.reltype<>0 and t1.relname like 'prod_part%';
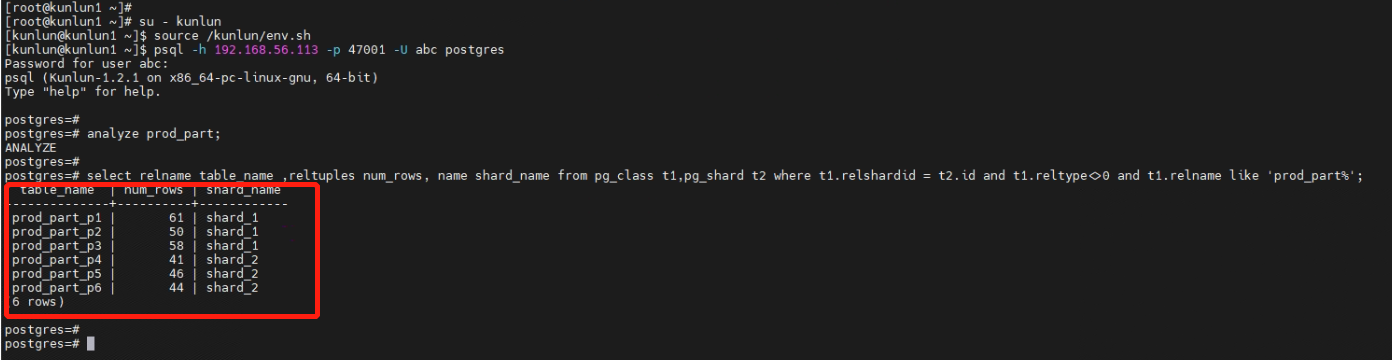
连接到计算节点192.168.56.113节点上可以看到分区表prod_part中,prod_part_p1、prod_part_p2和prod_part_p3分区存放在存储节点shard_1上,而prod_part_p4、prod_part_p5和prod_part_p6分区已扩容存放到存储节点shard_2上。
计算节点1(192.168.56.112)和计算节点2(192.168.56.113)上查看到的分区表prod_part的元数据保持一致。
完成多计算节点对表进行操作,与此同时搬迁表测试。
【END】